Centurion

Joined: 12 Apr 2006
Posts: 933
|
 Posted: Mon Jun 24, 2002 9:31 pm Post subject: Amazing stories of courage and dice (long battle report 1-3) Posted: Mon Jun 24, 2002 9:31 pm Post subject: Amazing stories of courage and dice (long battle report 1-3) |
 |
|
Derekcon 26 was a success! We missed some of the
usual suspects like Chris Damour and Rick Parrish, but
it was fun anyway. Besides, with those two making
excuses at home, my Normans had an easier path to
absolute victory. The tournament was two 1200pt lists
and 3 three hour rounds. Lists could be modified if
o.k.ed with Derek prior. I asked for and received
permission to run 11 E of HC. I didn't have another
element to play, but I paid for it in -points from
list.
Here is my list:
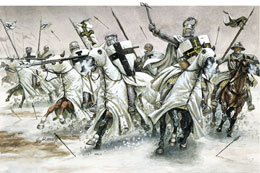
CNC +5 Irr A HC L/sh
5 x 2E IrrA/B HC L/sh
4E IrrC LC J/sh
3 x 6E IrrC/D HI/MI J/sh
6E IrrC LHI J/sh
6E IrrC LI SS
6E IrrC LI B
1170pt total
The army at 1200pt is a simple hold and hit army. As
is usual with Normans, one must simply move forward,
charge and roll up. Failure to do any of the three
will result in defeat. So....I did all three :)
First Game vs Kmer:
Enemy list as I remember:
CNC 2E El
3 x 2E El with SubG
2 x 4E LMI J/b/sh
4E LMI J/sh
2 x 8E LMI B
4 x 2E LI J/sh
2E MC J/sh
The preset terrain and random table start put me on a
clear table with no terrain vs. elephants and LMI. As
I have nothing in my list to even slow elephants other
than one unit of LHI (Khmer had 8 El), I decided to
move slowly forward until he committed to a plan, then
counter...yeah right. To my surprize, he set his
elephants in 2E units supported by his LMI. I
therefore, stretched his line with my LC and LI. This
had the desired effect of giving my HI and HC space to
avoid the El on his terms. Almost forgot, I used my B
list on this battle and it almost cost me the game.
The B list has 6E of MI B behind a pallisade, forced
marched in the center. They were routed off the
pallisade in one turn when they rolled down max, then
down again in support shot vs a 16 Rg B LMI J/B/sh
unit. The MI were routed on contact and screemed back
through my HI, but as the dicegods were on my side
none shook.
Now the battle was clearly going my way by bound 4, as
I had a dissordered enemy LMI unit behind my pallisade
with 2 HC units charging both it's flanks. His crap
LMI B on his left flank got tangled with an El unit as
they couldn't both get in the same place, so one of my
HI units walked up, took his shot for 1 CPF and
(supported on both sides with my PA moving forward
within 240 of an enemy) charged the El impetouosly and
routed it with a lovely up roll (as planned); the
routing El took care of the other two enemy units on
that flank as they shook (D morale troops). I turned
my attention to the center where his CNC was leading
the charge on the back on an El. I prompted my HC in
that region to retire like mad, and this was key to
his fatal mistake: He kept moving forward! In doing
this, he created a bulge between the reaking carnage
of my pallisade and my left flank. The tip of the
bulge was his CNC El unit and to either side were the
LMI. Well, I may be slow, but I figured out that my
HC can circle his CNC and strike the LMI behind.
Therefore, this is what I did. On the right side of
the bulge I prompted the LHI to move forward and
charge his LMI; they stuck. I then struck the LMI on
the flank, routing it passed some loitering LI who
shook as well. Then the final blow came when his one
unit of JLS armed MC went head to head with my Norman
HC. He rolled up 1.....I rolled up 3, which makes up
5...on the more table for 60. He routed passed the
far left (his right) El subgeneral who...of course,
rolled a 1. Game over 5-1 victory for the Normans.
this was an infantry fight for my bad boys, and I
loved it :)
Next installment: Roman LMI in the open, Oh my!
boyd
=====
Wake up and smell the Assyrians
__________________________________________________
Do You Yahoo!?
Yahoo! - Official partner of 2002 FIFA World Cup
http://fifaworldcup.yahoo.com
|
|


